GraphQL
Designing, testing, and debugging GraphQL APIs with Yasumu's built-in GraphQL client.
GraphQL
Yasumu's GraphQL module is a full-featured GraphQL client built right into your workspace. It lets you write queries, explore schemas, build operations visually, and run requests — all without leaving Yasumu.
Beta Feature
The GraphQL module is currently in active development. Some features may change as we iterate. Your feedback is welcome!
Getting Started
Setting up a GraphQL request takes just a few clicks:
Navigate to GraphQL
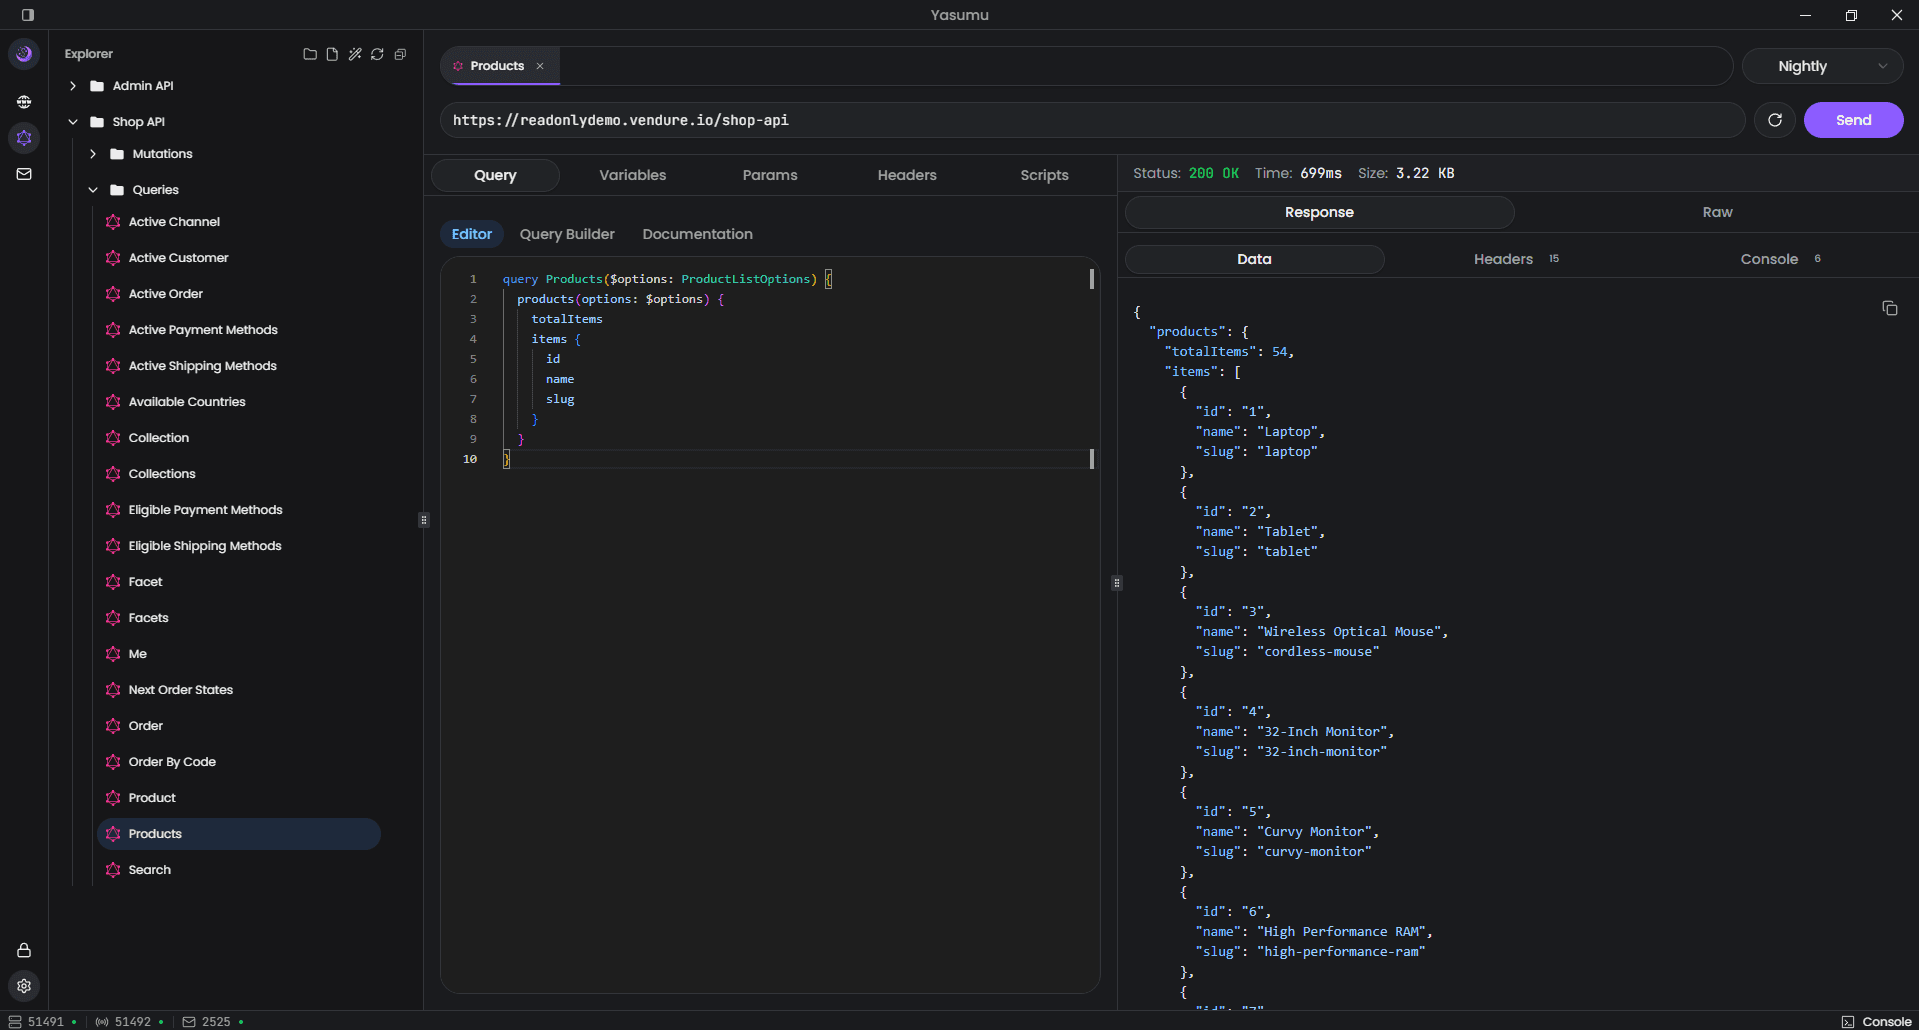
Open your workspace and click the GraphQL section in the sidebar. You'll see a file tree on the left and a welcome screen on the right.
Create a New Request
Click the + button in the file tree toolbar to create a new
GraphQL request entity. Give it a name like GetUsers or
CreatePost.
Enter Your Endpoint
Paste your GraphQL endpoint URL into the URL bar at the top (e.g.,
https://api.example.com/graphql).
Introspect the Schema
Click the Introspect button next to the URL bar. Yasumu will fetch the schema from your endpoint and unlock features like IntelliSense, the Query Builder, and the Documentation viewer.
Write and Send
Write your query in the editor and click Send (or press
Ctrl+Enter / ⌘+Enter). The response will appear in the panel on
the right.
Interface Overview
The GraphQL module is split into three main areas:
| Area | Description |
|---|---|
| File Tree | Sidebar listing all your GraphQL entities, organized into folders |
| Request Editor | Where you write queries, configure variables, headers, and scripts |
| Response Panel | Displays the response data, errors, headers, and console output |
The request editor and response panel sit side by side in a resizable split view. You can switch between horizontal and vertical layouts using the layout toggle.
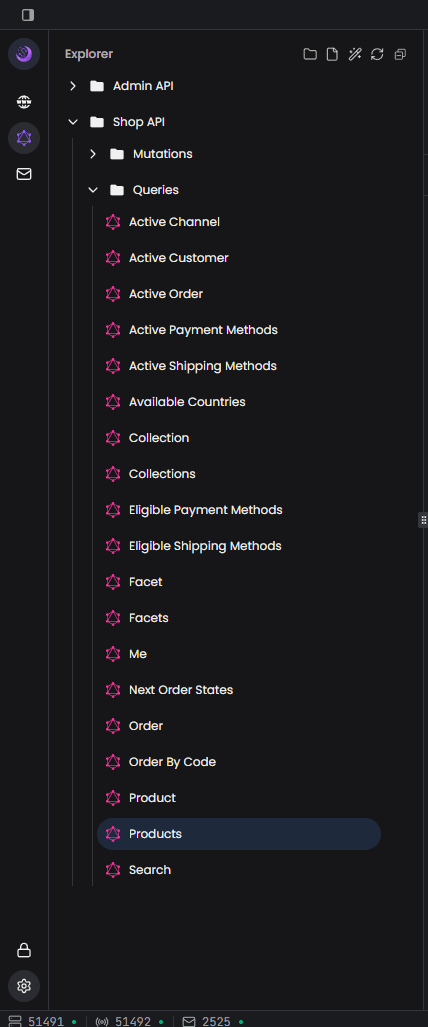
File Tree
The file tree on the left sidebar is where you organize all your GraphQL entities.
Creating Entities
- Click the + button to create a new request
- Right-click to create folders for grouping related operations
- Give entities descriptive names — they're stored inside the file, not as the file name
Organizing with Folders
Group related requests into folders by functionality. You can nest folders to any depth.
Context Menu Actions
Right-click any entity or folder to access:
- Rename — Change the display name
- Duplicate — Create a copy of the entity or entire folder
- Copy / Cut / Paste — Move entities between folders
- Delete — Remove the entity or folder
URL Bar & Introspection
The URL bar sits at the top of the request editor.

Entering a URL
Type or paste your GraphQL endpoint URL. The URL supports
environment variables using the {{VARIABLE}} syntax:
{{API_URL}}/graphqlVariables are resolved from the currently active environment at request time.
Introspecting the Schema
Click the Introspect button (next to the URL bar) to fetch the schema from your endpoint. Introspection:
- Enables IntelliSense in the query editor (autocomplete, error highlighting)
- Populates the Query Builder with all available operations
- Fills the Documentation viewer with the full type system
- Unlocks the Entity Importer for bulk generation
Auto-Introspection
Yasumu automatically introspects the endpoint when you first enter a URL or when it changes. You can also trigger it manually at any time.
Sending Requests
Click Send or press Ctrl+Enter (⌘+Enter on macOS) to execute
the request. While a request is in progress, the button changes to
Cancel so you can abort it if needed.
Query Editor
The Query tab is the heart of the GraphQL module. It contains three sub-views:
- Editor — A full-featured code editor for writing queries
- Query Builder — A visual, point-and-click query constructor
- Documentation — An interactive schema documentation browser
Switch between them using the sub-tab buttons at the top of the Query panel.
Editor
The editor uses Monaco (the same engine behind VS Code) with full GraphQL language support:
- Syntax highlighting for GraphQL queries
- IntelliSense autocomplete — field names, types, and arguments are suggested as you type (requires introspection)
- Error highlighting — invalid queries are underlined in real time
- Variable support — reference environment variables with
{{VARIABLE}}
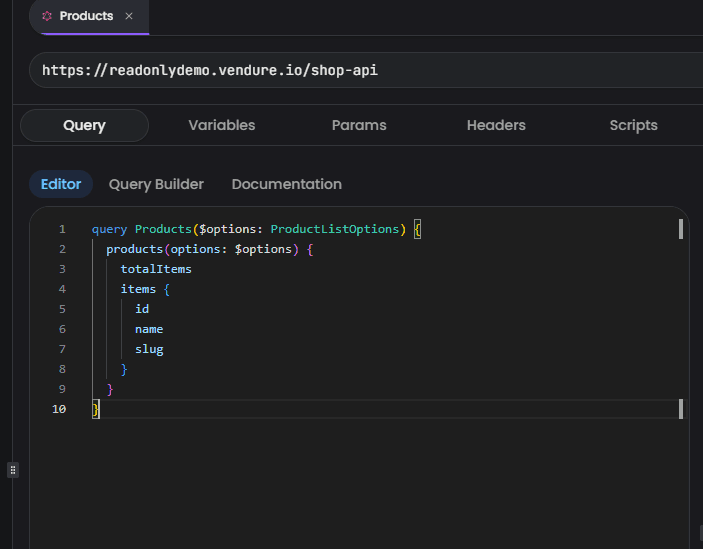
Write standard GraphQL queries, mutations, or subscriptions:
query GetUsers($limit: Int) {
  users(limit: $limit) {
    id
    name
    email
  }
}
Query Builder
The Query Builder lets you construct queries visually — no need to write GraphQL syntax by hand.
Schema Required
The Query Builder requires a schema. Click Introspect first to fetch the schema from your endpoint.
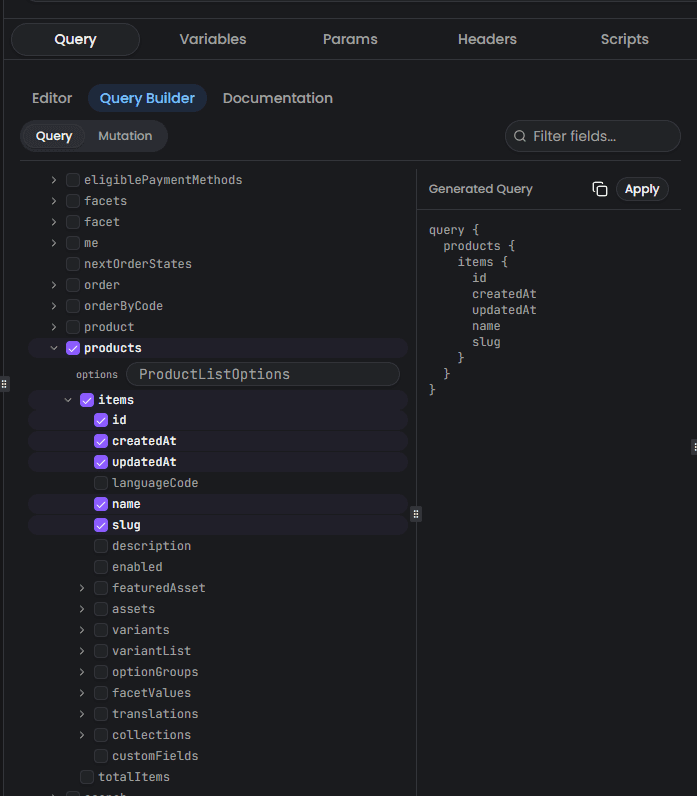
How It Works
Pick an Operation Type
Use the tabs at the top to switch between Query, Mutation, and Subscription — only types available in your schema are shown.
Select Fields
Browse the field tree on the left panel. Check the boxes next to the fields you want to include in your query. Expand nested object fields with the chevron (▸) to select sub-fields.
Set Arguments
When you select a field that has arguments, inline input fields appear directly below it. Fill in argument values as needed — required arguments are marked with a red asterisk (*).
Preview and Apply
The right panel shows a live preview of the generated query. When you're happy with the result, click Apply to paste it into the editor, or Copy to copy it to your clipboard.
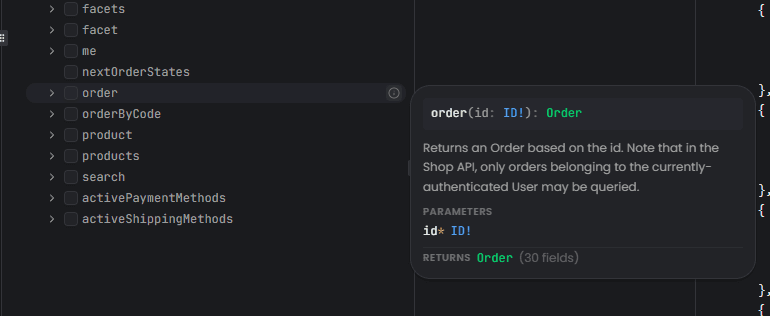
Field Documentation on Hover
Hover over the info icon (ℹ) next to any field to see a documentation popup showing the field signature, description, parameters, and return type.
Filtering Fields
Use the search box in the toolbar to quickly filter fields by name. This is especially useful for schemas with many operations.
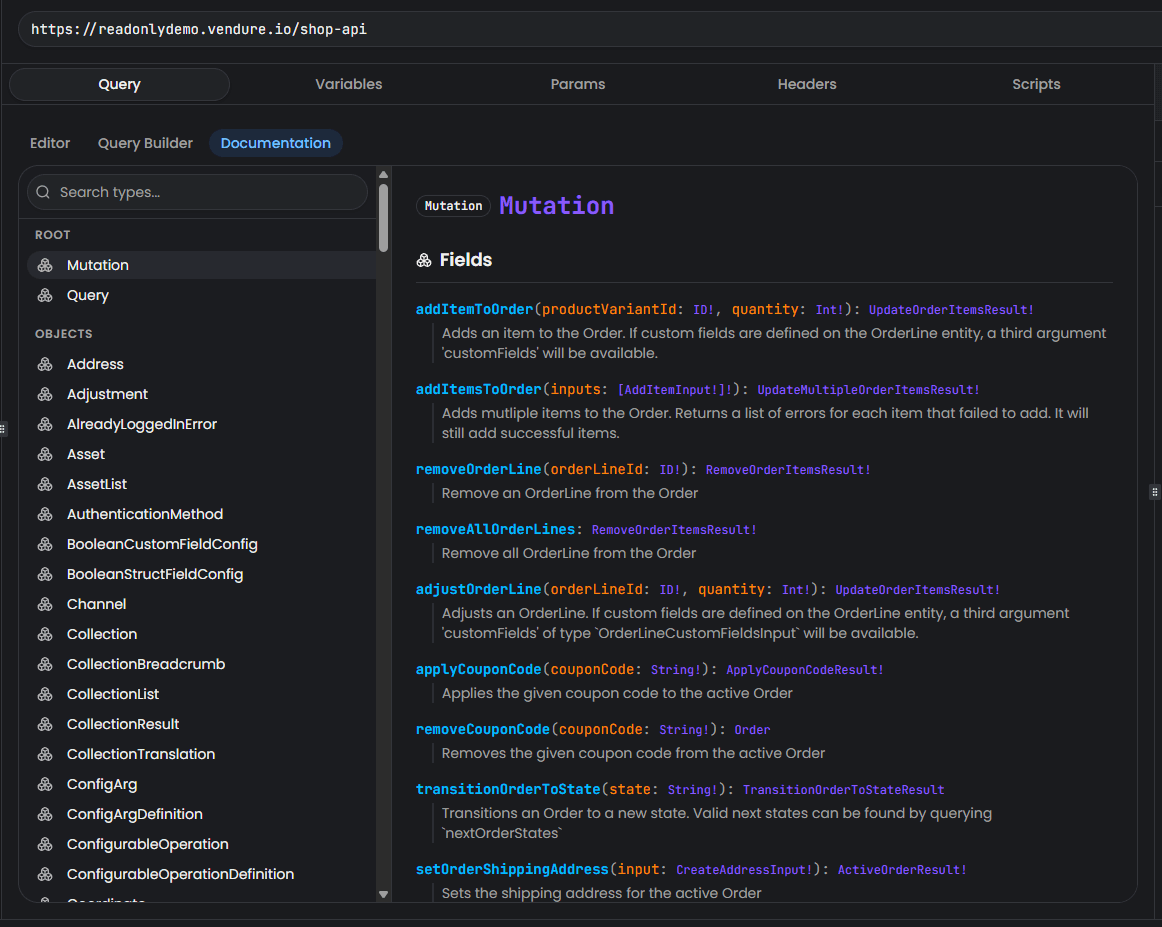
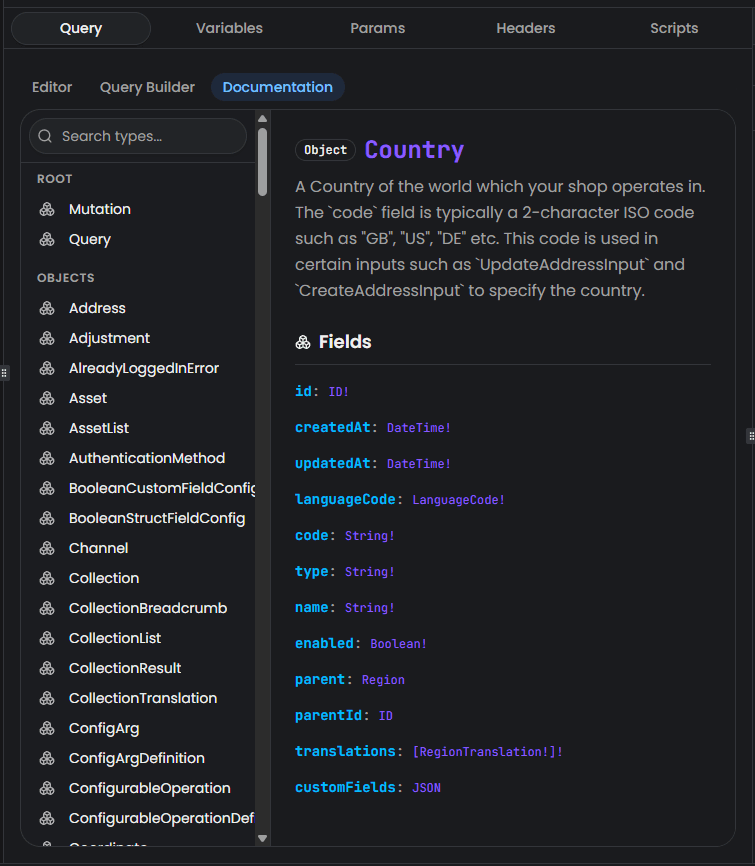
Schema Documentation
The Documentation sub-tab provides an interactive, searchable browser for your entire GraphQL schema.
Browsing Types
The left sidebar lists all types organized by category:
| Category | Description |
|---|---|
| Root | Query, Mutation, and Subscription root types |
| Objects | Regular object types |
| Inputs | Input object types (used as arguments) |
| Enums | Enumeration types |
| Scalars | Scalar types (String, Int, custom scalars, etc.) |
| Interfaces | Interface types |
| Unions | Union types |
Type Detail View
Click any type to view its full documentation in the main panel:
- Type badge — Shows whether it's a Query, Mutation, Object, Enum, etc.
- Description — The type's description from the schema
- Fields — Each field with its name, arguments, return type, and description
- Clickable type links — Click on any type reference to navigate to its documentation
Searching Types
Use the search box at the top of the sidebar to filter types by name. This makes it easy to find specific types in large schemas.
Variables Editor
The Variables tab lets you define the variables for your GraphQL query.
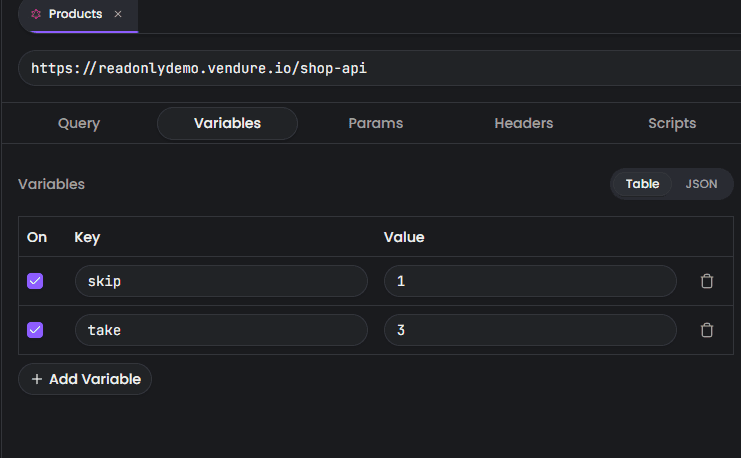
Table Mode
The default view shows a table where you can manage variables visually:
| Column | Description |
|---|---|
| On | Checkbox to enable or disable the variable |
| Key | Variable name |
| Value | Variable value |
Click Add Variable to add a new row, or the trash icon to remove one.
JSON Mode
Switch to JSON mode for direct editing of the variables object:
{
  "userId": "123",
  "limit": 10
}
Both modes stay in sync — changes in one are reflected in the other.
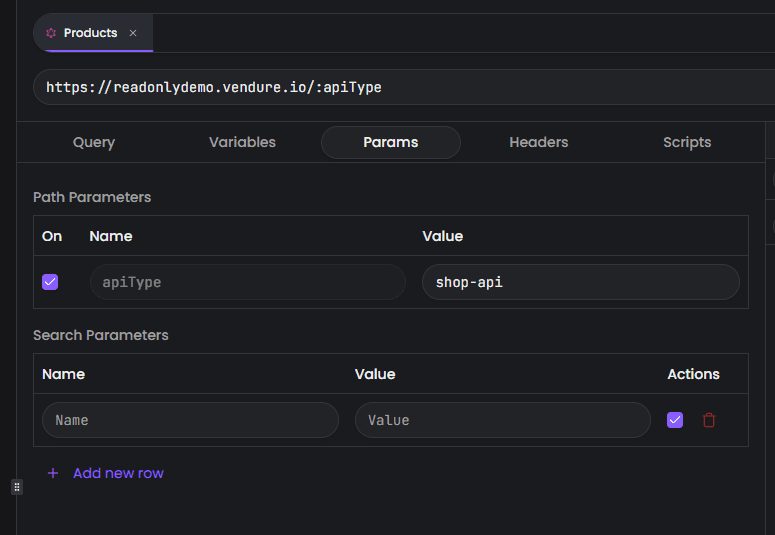
Parameters & Headers
Parameters Tab
The Params tab manages URL parameters for your request:
- Path Parameters — Automatically detected from
:paramsyntax in your URL (e.g.,https://api.example.com/:version/graphql) - Search Parameters — Query string key-value pairs appended to the URL
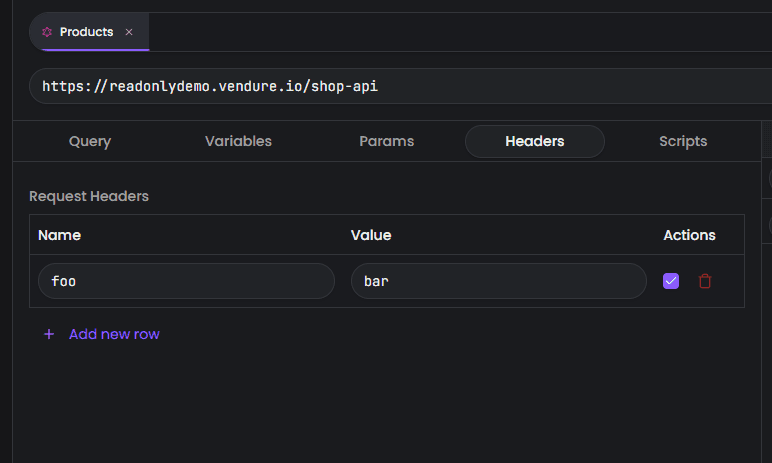
Headers Tab
The Headers tab lets you add custom HTTP headers to the request. Common use cases include:
- Authorization —
Bearer {{API_TOKEN}} - Custom headers — Any header your API requires
Each header has a key, value, and enable/disable toggle. Headers
support environment variables with {{VARIABLE}} syntax.
Scripting
The Scripts tab lets you write JavaScript code that runs at different stages of the request lifecycle:
onRequest(req)— Runs before the request is sent. Modify headers, variables, or the URL.onResponse(req, res)— Runs after the response is received. Process response data or update environment variables.onTest(req, res)— Define test assertions against the response.
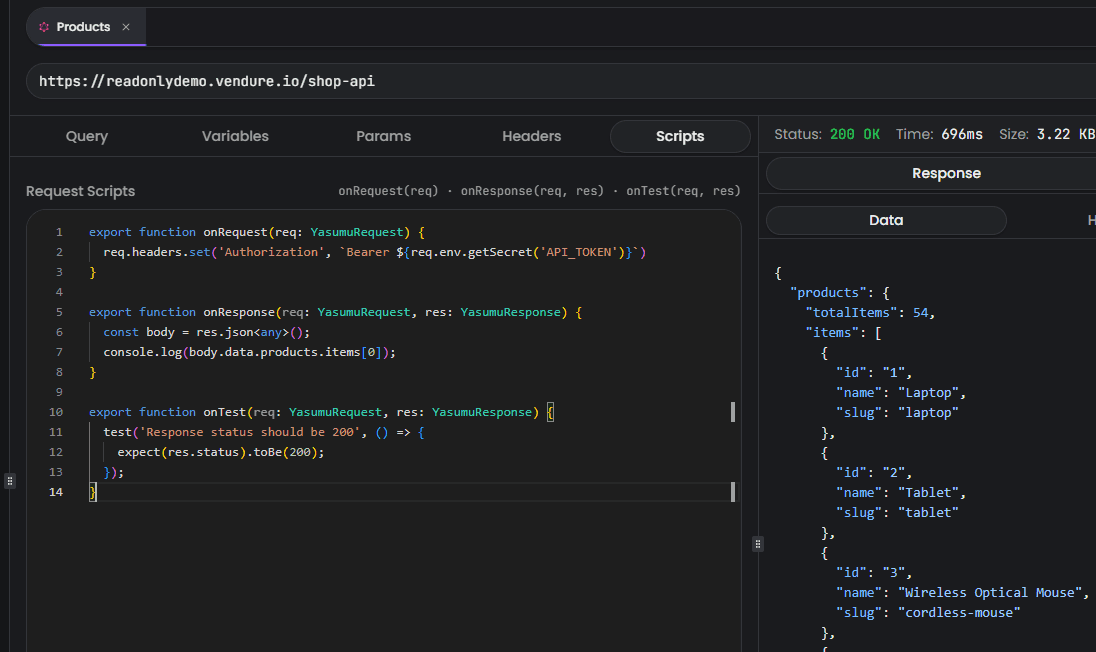
Example Script
// modify request
export function onRequest(req: YasumuRequest) {
  req.headers.set('Authorization', `Bearer ${req.env.getSecret('API_TOKEN')}`)
}

// consume response
export function onResponse(req: YasumuRequest, res: YasumuResponse) {
  const body = res.json<any>();
  console.log(body.data.products.items[0]);
}

// run tests
export function onTest(req: YasumuRequest, res: YasumuResponse) {
  test('Response status should be 200', () => {
    expect(res.status).toBe(200);
  });
}
The script editor includes TypeScript type definitions for autocomplete and error checking.
Script Execution Order
Scripts run in order: onRequest → HTTP request → onResponse →
onTest. If onRequest returns a mock response, the actual HTTP request is
skipped.
Entity Importer
The Entity Importer (also called the GraphQL Generator) can automatically generate request entities for every operation in your GraphQL schema. This is a huge time saver when working with a new API.
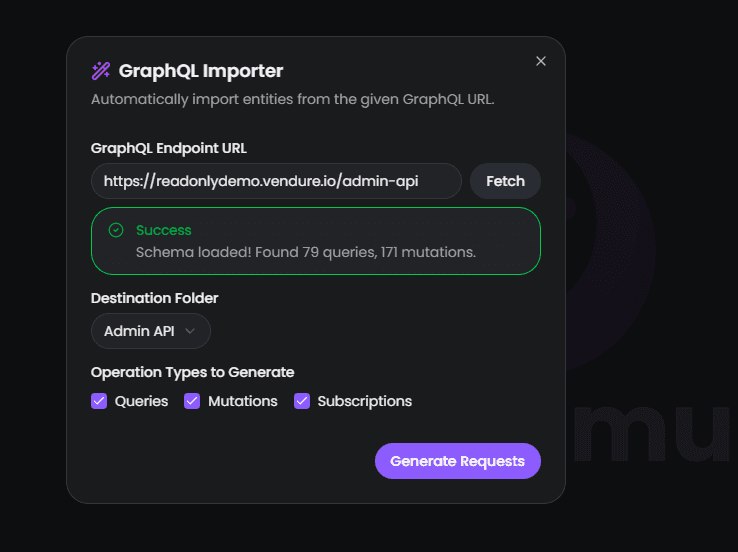
How to Use
Open the Importer
Click the wand icon (🪄) in the file tree toolbar to open the importer dialog.
Enter the Endpoint URL
Paste the GraphQL endpoint URL and click Fetch to introspect the schema. On success, you'll see a summary of discovered queries and mutations.
Configure Options
- Destination Folder — Choose where to place the generated entities (root or any existing folder)
- Operation Types — Use the checkboxes to include or exclude Queries, Mutations, and Subscriptions
Generate
Click Generate Requests to create all the entities at once. Yasumu automatically:
- Creates subfolders named Queries, Mutations, and Subscriptions
- Generates a separate entity for each operation with a pre-built query including all scalar fields and arguments
- Sets the endpoint URL for every generated entity
Non-Destructive
The importer creates new entities — it never modifies or overwrites existing ones.
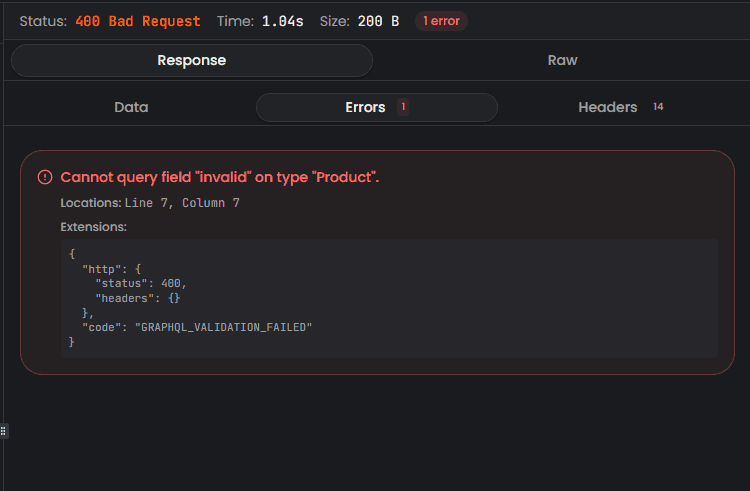
Response Panel
After sending a request, the response panel displays the result.
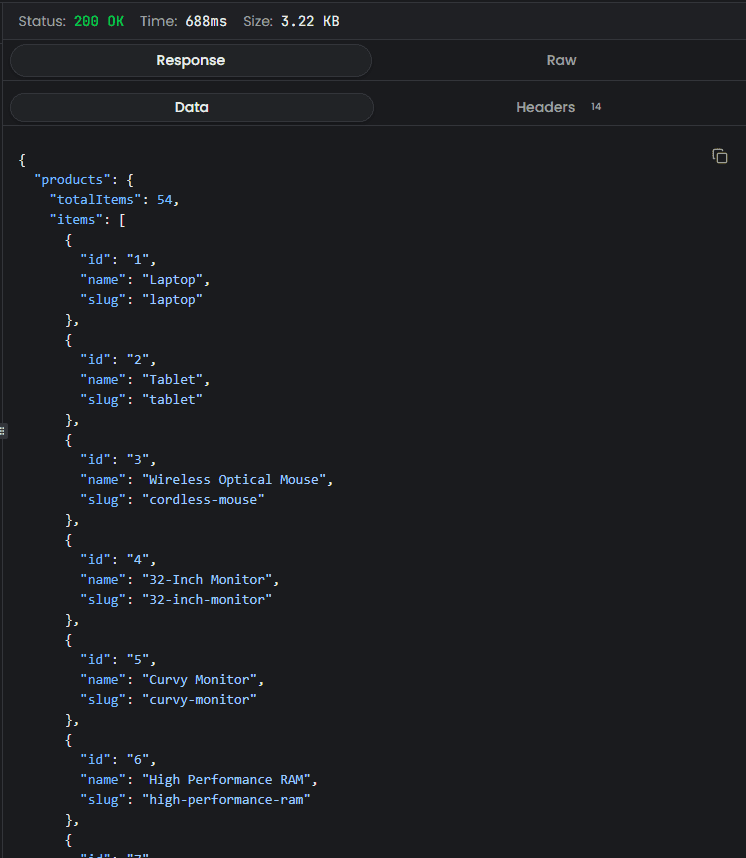
Status Bar
The status bar at the top shows:
- Status Code — HTTP response status (color-coded: green for 2xx, yellow for 3xx, orange for 4xx, red for 5xx)
- Response Time — How long the request took
- Response Size — Size of the response payload
- Error Count — Number of GraphQL errors, if any
Response Tabs
| Tab | Description |
|---|---|
| Data | The data field from the GraphQL response, formatted |
| Errors | GraphQL errors with messages, paths, and locations |
| Headers | Response headers from the server |
| Console | Script output from onRequest, onResponse, and tests |
| Raw | The full, unprocessed response body |
The Errors and Console tabs appear only when there is content to display. If the response contains errors, Yasumu automatically focuses the Errors tab.
Tab Features
- Click a tab to switch between open entities
- Middle-click a tab to close it
- Hover over a tab to see the entity name and endpoint URL
- The active tab has a highlighted indicator at the bottom
Environment Selector
The environment selector sits at the end of the tab bar. Switch
between environments to change which variables are used when resolving
{{VARIABLE}} references.
Keyboard Shortcuts
| Shortcut | Action |
|---|---|
Ctrl+Enter / ⌘+Enter | Send request |
Ctrl+W / ⌘+W | Close active tab |
Ctrl+Tab / ⌘+Tab | Switch to next tab |
Ctrl+Shift+Tab / ⌘+⇧+Tab | Switch to previous tab |
Ctrl+1-9 / ⌘+1-9 | Jump to tab by position |
Best Practices
- Introspect early — Always introspect the schema first to unlock IntelliSense, the Query Builder, and Documentation
- Use the Entity Importer — When working with a new API, use the importer to scaffold all operations in seconds
- Organize with folders — Group related operations (e.g., by resource or domain) for easy navigation
- Use environment variables — Avoid hardcoding URLs and tokens.
Use
{{VARIABLE}}syntax and switch environments as needed - Write scripts for auth — Use
onRequestscripts to automatically attach authentication headers - Add tests — Use
onTestto validate responses and catch regressions - Commit to version control — GraphQL entities are stored as
.yslfiles, designed for clean diffs and collaboration